
To flare a baseball glove, place a baseball in the glove pocket and tie it with a rubber band for several days until the desired flare is achieved. To increase the flare, repeat the process with a larger ball or add a ball to each side of the glove.
Flaring a baseball glove can help make catching easier by creating a wider opening for the ball to enter and making a player’s movements more fluid.
If you’re serious about baseball, you know there’s nothing like a perfectly broken-in glove molded to your hand.
It’s an essential piece of equipment that helps you catch even the toughest flies and grounders, but it can also take some time to get it right.
One technique many players use to break in their gloves is to flare them – widening the glove pocket to make catching easier and smoother.
In this article, we’ll take you through exactly how to flare a baseball glove so that you can get the most out of your game.
Understanding Flaring
A well-flared baseball glove can make a significant difference in enhancing a player’s performance. It takes time and effort to create the right flare, but once it’s done, it can improve the catching ability of the glove and give the player more confidence on the field.
Here are the key points to understand about flaring a baseball glove:
The Benefits of Flaring a Baseball Glove
- Flaring a baseball glove helps create a deeper pocket, improving the player’s ability to catch the ball.
- The player can better control the ball when the pocket is more profound, avoiding turnovers and missed catches.
- A well-flared glove can help the player easily snag ground balls, reducing errors and improving performance.
How to Flare a Baseball Glove
- Begin by softening the glove’s leather by applying glove oil or conditioner.
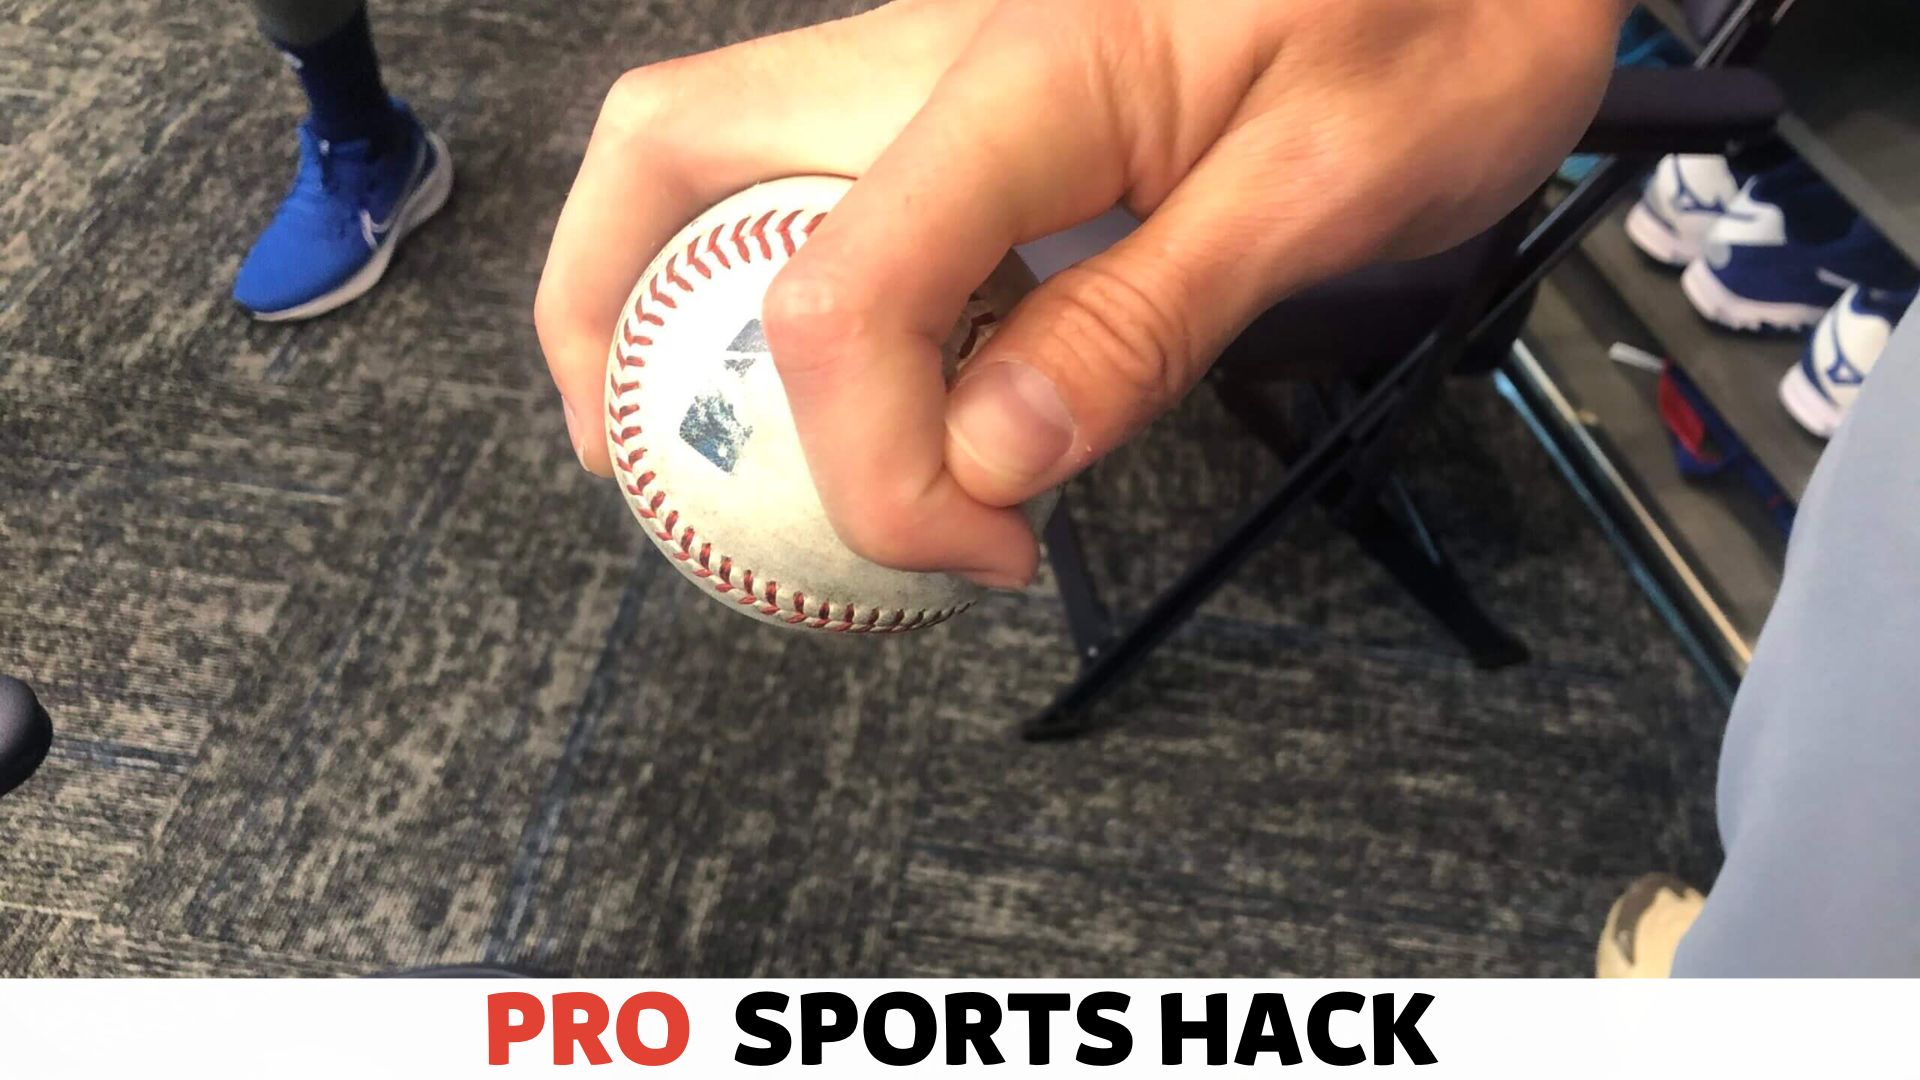
- Place a baseball in the glove pocket and wrap a rubber band around it to create the desired shape.
- After a few days, remove the baseball and repeat the process until the pocket is adequately formed.
- Use a glove mallet or your hands to shape and compress the leather around the pocket to form the best possible flaring.
The Importance of Maintaining a Flared Glove
- Continuous use of a well-flared glove can cause it to lose shape, making it essential to maintain the flare regularly.
- Reapplying glove oil or conditioner to the leather can prevent cracking and stiffness, which can hamper flexibility.
- Store the glove appropriately by keeping it in a dry place after use, which will help retain the shape of the flare and prolong its lifespan.
Flaring a baseball glove may seem like a challenging task, but it is beneficial in the long term. Flaring helps the player catch the ball and control it better.
By softening the leather and creating a deeper pocket, a player can maintain the excellent performance of their glove for a more extended period.
You’ve mastered flaring your baseball glove, and now it’s time to explore “A Step-by-Step Guide to Throwing the First Pitch at a Baseball Game.” Learn how to impress the crowd with your pitching skills.
Steps to Get Your Glove Ready for Flaring
Before flaring your baseball glove, you must prepare it properly. By following these simple steps, you can get your glove ready for flaring easily and efficiently:
- Choose a proper glove: To prepare a glove for flaring, you need a suitable glove. Choose a high-quality leather glove in good condition that will hold up well during flaring.
- Condition the glove: It is important to condition the glove properly before flaring. Use a safe leather conditioner to soften and moisturize the glove’s material.
- Heat the glove: Heating the glove is critical to getting your glove ready for flaring. Apply heat to the glove with a hairdryer for 5-10 minutes until the leather becomes pliable.
- Lace the glove: The next step is to lace the glove. Using a mallet or a bat handle, pop out the existing lacing holes in the glove and create new ones closer to each other.
- Tie the glove: Finally, tie the glove while still warm to ensure it retains the desired shape and conforms to your hand’s shape.
By following these simple steps, you will ensure that your glove is well-prepared for the flaring process, ensuring it is long-lasting and ready to perform well on the field.
Keep on reading to find out how to flare a baseball glove perfectly.
Conditioning and Preparing the Leather
As a baseball player, one of the most important things you must do is prepare your glove. A good-quality baseball glove is stiff, making it challenging to catch the ball accurately.
One way to fix this is by softening the glove to make it easier to catch.
Here’s how to condition and prepare the leather to make your glove game-ready.
Using a Glove Oil or Conditioner
A glove oil or conditioner can help soften the leather and make the glove game-ready.
Here are the steps to follow when using glove oil or conditioner:
- Clean the glove thoroughly using a damp cloth to remove any dirt.
- After cleaning the glove, apply a small amount of oil or conditioner to the leather.
- Rub the oil or conditioner into the glove’s pores, ensuring it penetrates the leather entirely.
- Leave the glove to dry overnight.
- The next day, take a baseball and hit it into the glove to form a pocket.
Using a Mallet or a Wooden Stick
Another way to soften the leather and mold the glove is to use a mallet or a wooden stick.
Here are the steps to follow when using a mallet or a wooden stick:
- Apply a small amount of glove oil or conditioner to the glove and let it sit for a few minutes.
- Insert a baseball into the glove and tie it tightly with a rubber band or a string.
- Use a mallet or wooden stick to hit the glove’s pocket repeatedly.
- Hit all glove parts, ensuring your strikes penetrate the leather without tearing it.
- The more you use the glove, the more it will soften and mold to your hand.
Using Water and Heat
Water and heat can help soften the leather, making it easier to mold your glove.
Here are the steps to follow when using water and heat:
- Apply a small amount of glove oil or conditioner to the leather.
- Fill a sink or a bucket with warm water and immerse the glove entirely.
- Remove the glove from the water and squeeze the excess water out of it.
- Once semi-dry, place a baseball in the glove’s pocket and tie the glove tightly.
- Put the glove in the oven at 350°f for about 10 minutes.
- Remove the glove from the oven and let it cool for a few minutes.
- Finally, remove the baseball from the glove and use your hands to mold it into the shape you want.
Conditioning and preparing your baseball glove is crucial to ensure that you can catch the ball accurately. Using glove oil, conditioner, mallet, or water and heat softens the glove and makes it game-ready.
With proper care, your glove will last longer and help you play to the best of your ability. Enhance your throwing game even further by checking out our comprehensive guide, “A Guide to Throwing a Baseball with Explosive Distance.” From glove flaring to long-distance throws, we’ve got you covered.
Shaping the Glove
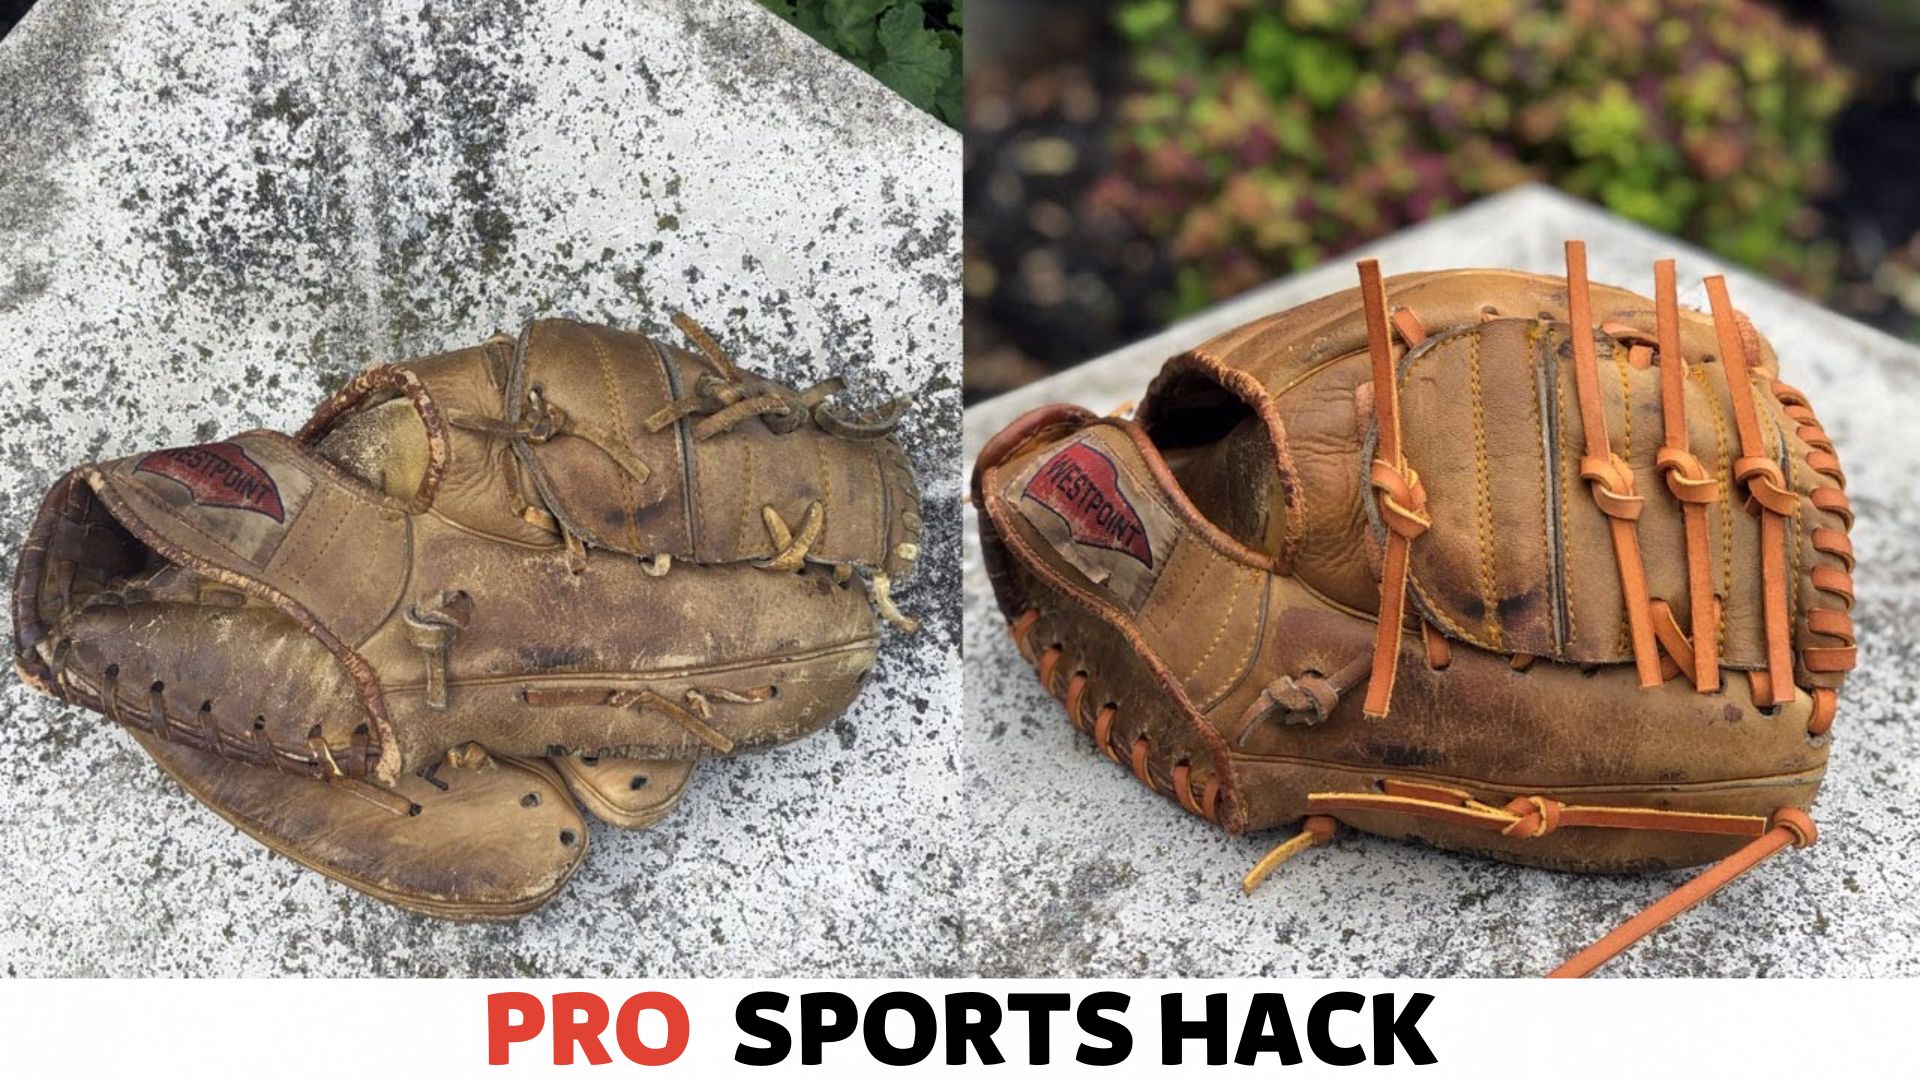
Shaping your baseball glove is crucial to maintain its integrity and allow you to perform at your best. Flare points on a glove increase its surface area, making it easier to catch the ball.
Tapping the Flare Points
One of the first things you must do to shape your glove is tapping the flare points. The flare points are the folds in the leather that have been thinned to accommodate your index and little fingers, allowing a better grip.
Tapping is a technique that dilutes and softens the leather in these areas to create a crease, which makes it easier to close the glove around the ball.
To do this, follow these simple steps:
- Get a baseball or softball.
- Place the ball in the pocket of the glove.
- Fold the glove in half by the thumb.
- Add a rubber band around the glove from top to bottom.
- Tap the glove on the flare points with a mallet or your fist.
Forming the Flare Points
Once you have tapped and softened the leather around the flare points, it’s time to form them. Forming your flare points is essential as it will give you a more rounded and comfortable pocket to make catching and throwing easier.
Here’s a step-by-step guide to forming flare points:
- Apply a small amount of water to the leather as it helps soften the leather material, making it easier to shape.
- Fold the thumb on the glove inwards.
- With your hand, press down on the thumb area of the glove, forming a crease where the center of your palm will be.
- Place a baseball inside the pocket of the glove.
- Fold the index and little finger of the glove towards the baseball and secure the pocket with an elastic band.
- Leave the glove in the sun, allowing the leather to dry and create a natural flare.
Shaping your glove is essential to keep in top performance while playing baseball. Use these techniques to tap and form the flare points for optimal performance, allowing you to catch and throw the ball better.
Remember to take your time while shaping the flare points, as this will give you a better catch when playing the game; so happy shaping!
Shaping the Flares for Optimal Performance
Flaring your baseball glove enhances your playing performance, helping you get the most out of your gear.
In this section, we’ll focus on the shaping process of flaring your baseball glove and what you need to know to optimize your glove’s performance.
The Importance of Allowing the Glove to Set
Allowing your glove to rest after flaring is an essential part of the process. Here’s why:
- Resting helps protect the glove’s durability: Your glove needs time to rest and recover after the added pressure from the flaring process. This resting period will relieve the pressure placed on the glove strings and leather, increasing the lifespan of your gear.
- Better ball control: During the rest period, your glove will adapt to the shape of your hand, providing you with better ball control. This helps players recognize and remember how their glove is expected to behave during games and practices, leading to greater confidence and control.
How to Shape the Flares for Optimal Performance
Shaping the flares of your glove ensures that it moves fluidly with the natural motions of your hand, improving your performance.
Follow these key steps to help you shape the flares:
- Break in your glove: Before flaring, break in your glove by playing catch, adding glove oil, and manipulating the leather. Fully breaking in your glove will make the flaring process much easier.
- Check the existing flares: Examine your glove and map out the existing flares on each side. If the glove is uneven, adjust it until both sides have the same amount of flaring.
- Position your glove: Place your glove in a position that mimics your hand’s position when you catch the ball.
- Use a mallet or hammer: Use a soft mallet or hammer to shape the flares gently. Begin by tapping the leather gently and gradually increase the pressure as you go.
- Apply heat: Use a glove mallet or round object to create the desired flare shape. Then, you can hold a heat source, such as a hairdryer, over the flare to set the shape. The heat will enable the leather to hold its shape.
Taking care of your gear is crucial, and flaring your baseball glove is one way to get the best out of your equipment. Following these steps can enhance your glove’s performance and elevate your game.
Remember to take your time and give your glove plenty of rest.
Breaking In the Flared Glove: Shaping, Practicing, and Maintaining For Optimal Performance
Flaring a new baseball glove enhances its performance and makes it easier to catch the ball. But there’s more to it than just flaring. You need to break in the flared glove to get the optimal performance out of it.
Shaping a Flared Baseball Glove
Shaping your flared baseball glove is the first step towards breaking it in.
Here are the key points for shaping a flared glove:
- Apply a small layer of glove oil or conditioner to your glove.
- Place a ball or baseball in the glove.
- Close the glove around the baseball.
- Use rubber bands or strings around the glove to tie it up.
- Let the glove remain tied up for at least 24 hours.
Practicing With a Flared Baseball Glove
Once your flared glove is in shape, it’s time to practice with it.
Here are some tips for practicing with a flared baseball glove:
- Start slow with simple grounders.
- Gradually move to more challenging practice drills.
- Consider using a heavy ball or weight to increase glove strength.
Maintaining a Flared Baseball Glove
To maintain your flared baseball glove, remember to follow these tips:
- Keep your glove clean and dry.
- Apply a small amount of oil or conditioner to the glove after each use.
- Store your glove in a cool and dry place.
- Check for any signs of wear or tear and repair as needed.
A flared baseball glove is a must-have for any serious player, but knowing how to break it in is essential.
Follow these tips for shaping, practicing, and maintaining your flared baseball glove for optimal performance.
Maintenance and Care
A well-maintained baseball glove can last a lifetime, but without proper care, it can quickly deteriorate and become unusable. Keeping your flared baseball glove in optimal condition requires a regular maintenance routine and some elbow grease.
Here are some tips to help maintain your flared baseball glove in tip-top condition.
Clean Your Glove Regularly
Dirt and sweat can cause your flared baseball glove to become brittle and stiff.
To prevent this, it is essential to clean your gloves regularly. Use a soft cloth or sponge and warm water to remove dirt or grime from the glove’s surface.
Avoid heavy-duty cleaners or harsh chemicals, as they can damage the leather.
Apply Leather Conditioner
Leather conditioner is a must-have for maintaining the suppleness and softness of your flared baseball glove. Apply a dime-sized amount of the conditioner to your glove and work it into the leather.
Be sure to cover the entire surface of the glove, including the laces and the flared area.
Use a Glove Mallet
Breaking into a flared baseball glove can be a time-consuming process. Using a glove mallet can help speed up this process. Gently pound the inside of the glove with the mallet to soften the leather and create a pocket.
Store Your Glove Properly
Proper storage is crucial for maintaining the shape and condition of your flared baseball glove. Always store your glove in a cool, dry place away from direct sunlight. Use a glove mallet to reshape the glove after each use and wrap it with a rubber band to maintain its shape.
Keep Your Glove Dry
Moisture can cause your flared baseball glove to become moldy, smelly, and deteriorate quickly. After each use, wipe your glove with a dry cloth and leave it to air dry in a well-ventilated place. Avoid exposing your glove to direct sunlight or heat, as this can cause it to become brittle.
Don’t Overuse Your Glove
While using your flared baseball glove is essential to maintaining its shape, overusing it can cause it to wear out quickly. Avoid using your glove for activities other than baseball, as this can cause unnecessary wear and tear.
Store Your Glove With a Ball
To help create a pocket and maintain the shape of your glove, store it with a baseball or softball inside. This will help your glove maintain its shape and prevent it from flattening.
Avoid Extreme Temperatures
Extreme temperatures can cause your flared baseball glove brittle and stiff or become too soft and lose shape. Keep your glove cool and dry, and avoid exposure to extreme temperatures.
Don’t Use Your Glove as a Batting Practice Target
Using your flared baseball glove as a target for batting practice can cause it to become damaged and lose shape. Avoid this and keep your glove in top-notch condition using a designated batting practice glove or device.
Avoid Contact With Water
Water can cause your flared baseball glove to become stiff and rough. Always use a cloth or sponge when cleaning your glove, and avoid exposing it to water. Let your glove dry naturally in a cool and dry place if your glove becomes wet.
Maintaining your flared baseball glove is essential to keep it in tip-top condition and extend its life. These tips will help you maintain your glove and get the most out of it for years.
Want to get inside the mind of a baseball player? Learn “How to Mic Up a Baseball Player Like a Pro” and discover the game’s secrets from a whole new perspective, including tips on perfecting your glove flare.
FAQs
What is Flaring a Baseball Glove?
Flaring a baseball glove means reshaping it to increase its pocket size. This process involves manipulating the leather and laces to widen the glove’s design.
How Do You Prepare Your Baseball Glove For Flaring?
To prepare your baseball glove for flaring, apply glove oil to the leather and the laces. You should also put a baseball inside the glove and wrap it tightly with rubber bands.
What Tools Do You Need to Flare a Baseball Glove?
You need a heat source, such as a stove or a heat gun, and a shaping tool, such as a wooden dowel or a baseball bat, to flare a baseball glove. You also need glove oil, leather conditioner, and rubber bands.
How Long Does It Take to Flare a Baseball Glove?
The time it takes to flare a baseball glove varies based on the size, type of leather, and the level of flaring you desire. Generally, it takes up to 3 hours, including preparation time, to complete the whole process.
Can You Flare a Brand New Baseball Glove?
Yes, you can flare a brand-new baseball glove using the same process used to flare an old one. However, ensure you use a lighter heat source and less pressure to avoid breaking the leather fibers.
Conclusion
After reading this blog post, you should clearly understand how to flare a baseball glove effectively. Flaring your baseball glove helps improve your performance on the field by giving you a wider surface area to catch the ball.
You can confidently flare your glove with the step-by-step instructions and tips in this post. Remember to take your time and be patient as you work on flaring your glove, as rushing the process may lead to irreparable damage to the glove.
With proper care and maintenance, your flared baseball glove can last for many seasons, helping you make more successful catches and creating lasting memories on the field. Keep practicing, and enjoy the game!