
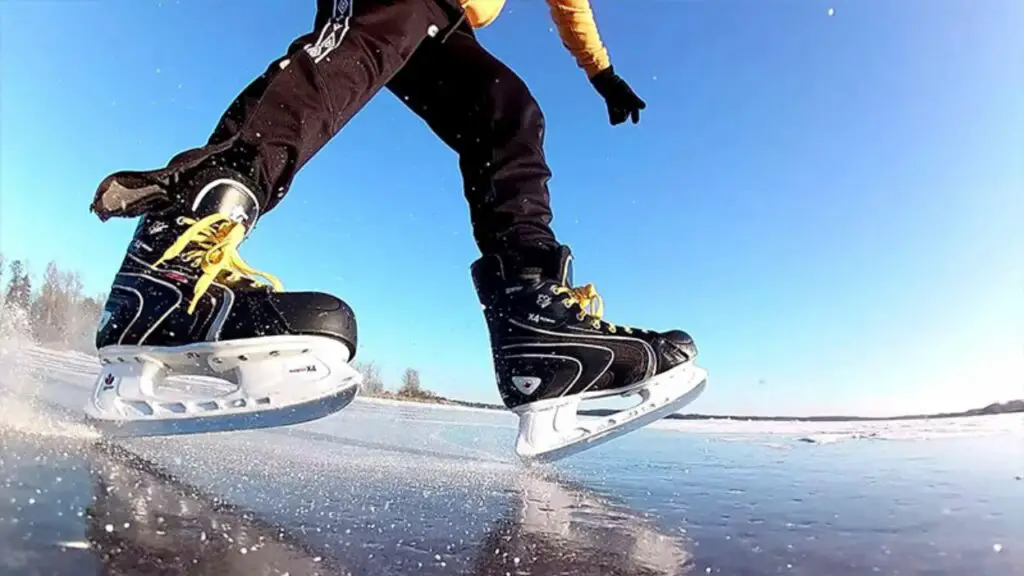
No, hockey skates cannot be rebaked. Re-baking can damage the structure and performance of the skate.
Hockey skates are an essential piece of equipment for any player, and they need to fit correctly to ensure optimal performance on the ice. However, if a player’s skates feel uncomfortable or too loose, they may wonder if they can rebake them.
Unfortunately, the answer is no; hockey skates cannot be rebaked. Baking the skates can help mold them to a player’s feet when they are brand new, but trying to rebake them can damage the materials and structure of the skate.
This can make the skates worse instead of improving their fit and performance.
In this article, we will explore why rebaking hockey skates is not recommended and what players can do if they are having trouble with the fit of their skates.
Skate Re-Baking: Definition, Purpose, and Benefits

Skate re-baking is a process of heating and refitting ice hockey skates to give players a more comfortable and custom fit. Hockey skates can be baked multiple times depending on the brand, making a considerable difference in performance.
Here are the key points to understand about skate re-baking:
Definition
Skate re-baking is heating the skates in a specialized oven and fitting them on the player’s feet to help form a better and more supportive fit. Skate re-baking helps to relieve pressure points, hot spots, and discomfort and provides customizable support to improve skating performance.
Purpose
The primary purpose of skate re-baking is to enhance the overall fit of the boot, thereby delivering better performance on the ice. When the skates are baked and cooled, they take on a personalized shape that follows the contours of your feet and ankles.
The new fit also offers better support and stability, which helps to increase power transfer, making for quicker and smoother strides.
Benefits
The list of benefits of skate re-baking is long and varied, as it helps to improve every aspect of skating. Here are some of the most significant benefits:
- Better comfort and fit that enhances the performance on the ice;
- Reduced break-in time for new skates;
- Improved mobility for better control while maneuvering on the ice;
- Increased skate life by reducing the stress on the boot materials;
- Better air circulation in the skates, resulting in better hygiene and reduced foot odor.
Overall, skate re-baking is an essential process to ensure optimal fit and comfort while playing hockey. It’s vital to note that the process should only be done by a professional or someone with experience.
Improper baking can cause long-term damage to the skates, which could result in frequent and costly repairs.
In the world of ice hockey, it’s essential to understand the different types of skates available, and that includes knowing what senior ice hockey skates are.
Determining the Need for Re-Baking: Signs, Fit Assessment, and Considerations
Hockey skates are essential equipment for any player on the ice. Along with providing protection, having adequately fitted skates helps players perform at their best on the ice. However, skates can become uncomfortably snug over time or lose their supportiveness.
In such cases, players may wonder whether they can re-bake their hockey skates to salvage their fit. This post will explore the signs that suggest a player’s hockey skates need re-baking, how to assess the fit of hockey skates, and important considerations to remember before rebaking hockey skates.
Signs That Indicate a Player’s Hockey Skates Need Re-Baking
Players should observe the following signs indicating that their hockey skates need re-baking:
- Significant discomfort while wearing skates; feet feel cramped or squeezed.
- Pain or blisters on the feet after wearing skates.
- The skates’ fit feels loose, causing slipping or instability during play.
- The skates’ original fit has changed significantly after extended use.
Assessing the Fit of Hockey Skates
Assessing fit is critical to ensure there’s a need to re-bake hockey skates; players can conduct the following activities:
- Look for signs of wear and tear on skates and assess the skates’ overall condition.
- Evaluate the general impression of the skates’ fit against the player’s foot, including space around the toe, heel, and arch regions.
- Check for areas of the skin around the foot that may be under pressure or red from wearing skates.
- Attempt a weight-bearing skate test involving standing on the skate, flexing the knees, and leaning forward. Any player who can feel pinched or uneven areas around the foot should check whether rebaking is necessary.
Essential Considerations Before Rebaking Hockey Skates
Before baking their skates, players should keep the following in mind:
- Not all skates can be rebaked; only specific models from reputable manufacturers are safe to re-bake.
- Take precautions before rebaking skates, like having certified hockey shops or professional experts handle the process.
- Players should only re-bake their skates once to avoid damaging the skates’ integrity by causing the material to break down.
Players need to care for their hockey skates to optimize their performance on the ice. If a player experiences noticeable discomfort, blisters, loosening, or significant change in skate fit, it may be time to consider rebaking.
However, before attempting to re-bake hockey skates, players should be aware of signs that indicate the need for rebaking, assess their skates’ overall fit, and keep essential considerations in mind to avoid damaging their skates during the process.
Preparation for Re-Baking: Ensuring Safety and Readiness for Skate Re-Molding
Before jumping into the re-baking process, ensuring safety and readiness is crucial. Here are a few points to keep in mind:
- Ensure the skates are clean and free from dirt, debris, or other substances that can interfere with re-baking.
- Place an insole inside the skate to help avoid any discomfort or injury.
- Wear protective gloves throughout the process to protect your hands from accidental burns.
- The temperature of the oven should be set at the manufacturer-recommended level. This ensures you won’t damage the skates while the material is being remolded.
- Use a timer to track the time required for the baking process.
The Re-Baking Process: Step-By-Step Guide
The re-baking process requires precision and patience. Here is a step-by-step guide to help you understand the entire process:
- Preheat the oven to the manufacturer-recommended temperature.
- Remove the insoles, footbeds, and laces from the skates.
- Place the skates on a baking tray or rack in the preheated oven.
- Set your timer according to the manufacturer’s recommendations for the skate’s material and your chosen remolding level.
- Once the timer goes off, turn off the oven and remove the skates, carefully using oven mitts to avoid burning your hands.
- Press your foot firmly on the insole and wiggle your toes to remold the skate’s shape according to your feet’s structure.
- Tighten the laces, let the skates cool down, and get set into the new mold.
With these simple steps and precautions, you can easily re-bake your hockey skates to help enhance their fit and performance, ensuring an optimal skating experience. Remember always to follow the manufacturer’s specific instructions, and in case you have any doubts regarding the process, don’t hesitate to contact a professional.
Proper skate maintenance is crucial for any hockey player. If you’re wondering if Pure Hockey sharpens skates, we’ll explore that in this article.
Re-Baking Process: Step-By-Step Guide for Re-Baking Hockey Skates

So, you’re thinking about re-baking your hockey skates to get them to fit better? Good news – by re-baking them, you can help to mold them to your foot for a more comfortable and secure fit. Here’s a step-by-step guide to the re-baking process:
Preparing the Skates
Before you start, make sure that you have everything you need:
- A heat source, like a convection oven or a heat gun
- A baking pan
- A thin towel to protect your feet
- Socks
Follow these steps:
- Preheat your oven or heat gun to the recommended temperature for your skate brand and model.
- Remove the footbeds, insoles, and laces from the skates.
- Place the skates in a baking pan.
- Loosely tie the laces of the skates to help keep their shape.
- Put on a thin towel and your socks. It’s essential to wear socks to protect your feet from direct heat exposure.
- Now it’s time to bake the skates.
Baking the Skates
Here are the steps to baking your skates:
- Place the baking pan with skates in the oven or use a heat gun to heat the skates.
- Keep an eye on them while baking to avoid any damage from getting too hot.
- Remove the skates from the heat source to the recommended time frame once heated.
- Sit in a chair, put the skates on, then lace them up tightly and let them cool for 10-15 minutes.
- After 15-20 minutes, remove the skates from your feet and let them sit for another 15-20 minutes to cool down completely.
After cooling, try them on again and check to see if there’s still any discomfort or tightness. You can re-bake the skates once again to achieve the perfect fit.
Benefits of Re-Baking
There are several benefits to re-baking your hockey skates, including:
- Enhanced comfort and fit
- Reduced break-in time
- Increased support
- Prevention of blisters and other foot injuries
Using the straightforward, step-by-step guide above, you can re-bake your skates and enjoy a more comfortable experience on the ice. Baking your skates is a simple process that can take your game to the next level.
Re-Baking Process: Step-By-Step Guide to Heat-Molding Hockey Skates

Are you tired of uncomfortable hockey skates? Do you want to mold your skates to fit your feet perfectly? Fortunately, you can re-bake your hockey skates to achieve the ideal fit. Keep reading for a step-by-step guide on how to heat-mold your hockey skates.
Pre-Baking Preparation
Before you get started, make sure you take the following steps to ensure a successful baking process:
- Remove the skate blades from your skates.
- Lace your skates up as you typically would.
- Put on thick hockey socks to ensure the proper fit.
Baking Process
Now that you are prepared follow these steps to bake your skates:
- Preheat your oven to 175 degrees Fahrenheit.
- Place your skates on a baking sheet with the toe box facing downwards.
- Put the baking sheet with your skates in the oven and bake for 4 to 6 minutes.
- Once the time is up, take the skate out of the oven carefully and use your fists to apply pressure to the skate heel. This process will help to imprint your foot in the heel pocket.
- Additionally, apply pressure to the toe box so it molds to your foot shape.
- Keep the skates on your feet for 10 to 15 minutes, and let them cool.
Post-Baking
After the baking process, follow these steps to complete the mold:
- Take off your skates and reinsert the blades.
- Loosen the laces and retie them to your liking.
- Do not use your skates for at least 24 hours after baking.
Re-baking hockey skates is a simple process that can make all the difference in your game. Use this step-by-step guide to heat-mold your skates and achieve the right fit. Happy playing!
After Re-Baking: Cooling, Settling, and Final Checks
Hockey players take their sport seriously, and rightly so. The right equipment can make or break their game. Skates are one of the most important pieces of equipment that every player needs to consider.
If they don’t fit perfectly, it can affect their performance and leave them with painful blisters and sores.
One solution is to rebake your hockey skates. After rebaking, we will discuss the final steps: cooling, settling, and final checks.
Cooling
After the skates have been re-baked, they must be left to cool down. This is an essential step. If you don’t allow the skates to cool, they’ll deform. That can reverse the results of the rebaking process.
If the skates were squeezed inward before being heated, they could be squeezed outward after heating.
For optimal results, turn off the heat and open the oven door. Leave the skates inside the oven for about five more minutes.
Settling
Once the skates have cooled, leave them alone for a few hours. This will give them time to settle. The heat from the oven can cause the material to expand, so giving the skates time to cool down and settle is necessary.
You mustn’t wear the skates immediately, and you shouldn’t tighten the laces too much.
Final Checks
The last step is to make final checks. Put the skates on and test them on the ice. Remember to tighten the laces. You should feel a snug and comfortable fit without any pressure points. Here are some things to check for:
- Check if there are any heel lifts.
- Test your agility by doing tight turns and stops
- Wiggle your toes to ensure there’s enough room in front of them
- Take a stride and ensure your ankle is locked into place
Once you’ve taken all these checks, consider your rebaking process successful.
Hockey players should always ensure proper equipment fit, and skates are no different. You can adjust their fit by rebaking your skates to fit your feet like a glove. However, it’s crucial to follow all the steps, including the cooling, settling, and final checks.
Doing this gives you comfortable and secure hockey skates to boost your performance.
Tips for Maintaining Re-Baked Skates: Ensuring Longevity and Performance
Re-baking hockey skates can make a significant difference in the fit and comfort of your skates. The process allows the skate boot to mold to the specific shape of your foot.
This enhances the skate’s performance, making skating easier and improving your overall skating experience.
However, regular maintenance is crucial to ensure longevity and performance. Here are some tips for maintaining re-baked skates:
Dry Them Properly
Make sure to dry your skates properly after each use. Wipe the exterior with a towel and leave them open to air dry. Avoid drying them with direct heat as it can cause damage to the leather.
Apply Proper Oiling
It is essential to frequently oil your skate blades to protect against rust and minimize friction. Use oil specially formulated for skate blades and apply it in a thin, even layer.
Regular Blade Sharpening
Regular sharpening of your skate blades can improve your overall skating experience and protect your skates’ quality. Skates that are not sharp enough can cause unnecessary strain on your feet and legs.
Protect the Skate Boot
The boot of the skate is crucial for the overall fit and performance. Keep them in good condition by using protective covers when not in use. Also, avoid walking on hard surfaces while wearing skates, as it can damage the boot’s sole.
Create a Regular Cleaning Routine
Clean your skates regularly to protect against bacteria and bacteria buildup. Use a soft cloth to wipe down the exterior of your skates, and use a mixture of water and mild soap to clean the interior.
Proper maintenance of re-baked hockey skates ensures their longevity and performance. Follow the tips above and take care of your skates to maximize their potential after each use.
Remember, your skates are an investment, and proper maintenance can make all the difference in the rink.
One effective way to customize the fit and improve the performance of your hockey skates is by learning how to bake hockey skates at home. But first, let’s dive into the basics of skate types with what are senior ice hockey skates.
Frequently Asked Questions
Can You Rebake Hockey Skates to Improve Fit?
Yes, you can. Rebaking is reheating the skates to mold them to your feet.
How Often Can You Rebake Hockey Skates?
You can rebake hockey skates two to three times, depending on the quality of the skate.
Should I Take My Skates to a Professional to Rebake Them?
It is not necessary, but it is recommended to get your skates rebaked by a professional to avoid any damage.
Can You Rebake Any Hockey Skate, or Does It Work Only for Certain Types?
Most hockey skates can be rebaked, but it is essential to consult the manufacturer’s instructions.
How Long Does It Take to Rebake the Hockey Skates?
It takes around 10 to 12 minutes to rebake hockey skates. It is essential to follow the manufacturer’s instructions for accurate timing.
Will Rebaking Hockey Skates Damage Their Protective Features?
Rebaking hockey skates is a safe process if done correctly. It won’t damage the protective features if it follows the manufacturer’s instructions.
Conclusion
The question of whether one can rebake hockey skates now has an answer. While it is possible to do so, it is not something recommended by experts in the field. The overall structure and integrity of the skates may be affected and could lead to an unsafe playing experience.
Instead, taking proper precautions before purchasing skates is recommended to ensure a comfortable fit. This includes wearing proper socks and taking the time to try on multiple pairs.
Additionally, consulting with a trained professional for assistance with fittings and advice on caring for your skates can prolong their lifespan.
By taking these steps, players can ensure they are fully equipped to perform at their best and enjoy the game safely.